Showing posts with label denim. Show all posts

Wednesday, February 23, 2022

Baby blanket recycle denim

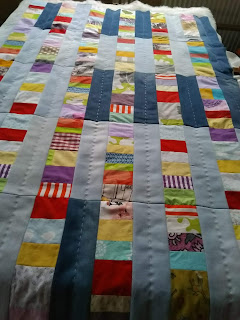
 Two days later I have made 25 blocks the same way.

One pair of jeans gives new life for 7-10 blocks depending on how big they are, how worn are etc.

I used different colors which gives additional effect in design.


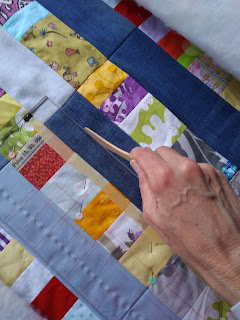
 I decided to make running stitch on the denim stripes. 

I have stuck a paper tape on the ruler to know where to mark a line without measuring every time.


 Still wandering if add FMQ on color pieces...

Tomorrow will think again.


Monday, February 21, 2022

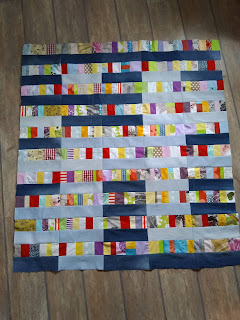
Scrap buster denim quilt

 I was given some jeans to recycle and wandered what to do with denim.

I collect scraps different ways. The stripes are separated from other pieces, which are divided light and dark.

My scrap buckets are full. 

The block I made is easy - collected stripes and denim stripes.

How to make the block easy?

1.You need different fabric's stripes long around 6 or 9 inches. If they are shorter stitch two of them together to make the stripe longer.
 

2. Stitch along the stripes right sides together. Chain sewing for fast speed.


3. Repeat till have block around 10 inches width. Divide this block in 3 inches stripes.


4. Cut denim stripes 3x10 inches.

5. Stitch together colored and denim stripes. Trim if needed.

* Iron all seam allowances open.

Saturday, May 9, 2020

Recycled lap quilt

Today I began a new lap quilt - some jeans and shirts have been waiting to be recycled.

It is absolutely improvisational top.

Removed the waistband, inner seam allowances added some triangles to build a rectangles shape and gathered them at the end.

Fast and furious :)


Instead of batting I will add a polar blanket.

It will be a picnic quilt/ lap quilt size and I am wandering about backing.

I will digging in my stash tomorrow.

Wednesday, March 4, 2020

Leap denim quilt

Do you think the people born on 29 of February are younger, as a spirit of course.
They celebrate once every four years, but their age is the same as the age of people born in same year, but not on 29  of February.
I was invited at the birthday party of a 60 years old man.
Thinking of present decided that a quilt was one possible choice.
I want to make a tied quilt for a long time.
I want to use a blanket for the back.
So the Leap denim quilt was born.
I have bought a blanket 200x150 cm.
About the top - recycled denim seemed a good idea for a man. I have one pair of his own jeans.
60 pieces as 60 ages, every forth is decorated with a piece of shirt, some are embroidered with events as children's birth, finishing schools etc.


The back is a KOH blanket - soft and cozy.


 After finishing I have packed and add a card, made with small leftover pieces.


Friday, December 18, 2015

Upcycled Denim Apron

I have had interests in recycling for years.
I collect interesting velvet shirts, bandanas, satin pieces, taffeta, silk and organza.
My friends know about my passion ad help me in my efforts.
Sometimes I have no idea about future usage of any piece I receive, but collect them accurately.
This habit pays me back when need an interesting accent for my new creation.
I like making contemporary quilts, so having various pieces never is enough.

Denim scraps are always a good decision for making different gadgets, so I have started a special board named DENIM on my Pinterest account.

Last my idea is to make an apron from old denim.


Rip the side seams and stitch together the trousers' legs to receive a rectangle about 32 x 23 inches.
Draw a pattern on the "new fabric".
Here are the measures.


If you have zig zag scissors use it.
I like rough edges so decided on using a method like rag quilt. Sew a stitch about a presser foot from the edge an clip every quarter inch.

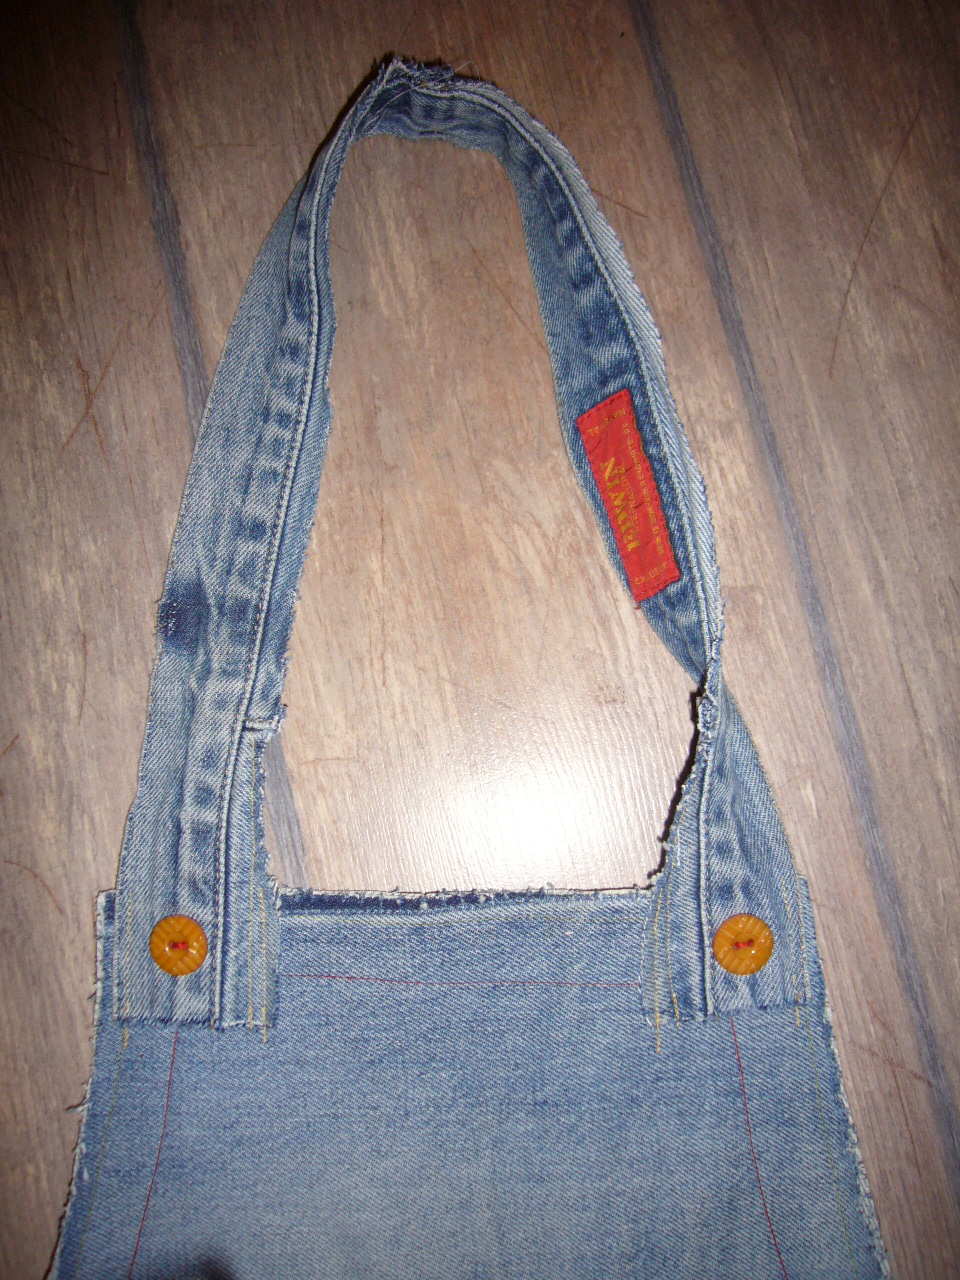
For the neckstrap cut 25 inches long from waistband stitch firmly.
I have added buttons.


Do you wander about pocket?
Cut one of the back pocket and applique.


If the fabric is worn out somewhere add some darning with stitching or adding a patch.


The back of the apron


Friday, February 8, 2013

Hippie mug rug

 Last morning when I have preparing a whole-wheat bread with different seeds I have seen the following picture in the pan.


It looked like a hippie sign.   
Wikipedia
The hippie subculture was originally a youth movement that arose in the United States during the mid-1960s and spread to other countries around the world. The etymology of the term 'hippie' is from hipster, and was initially used to describe beatniks who had moved into San Francisco's Haight-Ashbury district. The ultimate derivation of the terms hip and hep is uncertain, but both were clearly inherited from African American culture and denote "awareness"
Flower children were also associated with the flower power political movement, which originated in ideas written by Allen Ginsberg in 1965.

All this inspired me to make a Hippie mug rug.
If a man want to have a mug rug I think he hardly likes sweet embroidered mug rugs that is usually made.
I decided to make from recycled denim.
The back have to be very colorful and except the sign I put a heart and flowers.
All the appliqued shapes are rough edges. The mug rug is frayed, too.


And the back.


Get the pattern from HERE or the finished product from HERE.

 Make love not war!

Thursday, January 31, 2013

Another upcycled shopping bag

Do you remember the shopping bag some posts ago?
It was the second one I have made using recycled fabrics.
The first one was with a special pocket.
I always lost my "have to buy" list and was angry finding I forget to buy something I need.
Of course I go the shop again.
This idea inspired me suddenly by night. What will be happen if I have by hand my list.
On the shopping bag.
Yes, this would be great. A special pocket for the list.
Think a little bit what is the perfect size of a bag.

Sew the pocket first and then follow the tutorial from before.
The finished "windows"pocket is 4"x 8". 
Sew together some scraps to have 4,5" x 8,5" rectangle.
Cut a small rectangle 2" x 6" inside (I made a curved shape for one side.)
You could make oval schape, too. It is up to you.
Cut the same rectangle from lining.
Right side together sew ONLY along inner edge.
Clip the corners and curved seam allowance  half inch apart to stay flat after turning over.
Fold the edges and stitch only the upper one.


Place a piece of elastic cord  for fastening and pin.
Place on the front part of the bag and stitch.


Now you can put your Have to buy list and go shopping.

Tuesday, January 22, 2013

Recycled denim shopping bag

Everybody has a pair of old jeans. Or more, probably.
A friend of mine asked me to sew a shopping bag from her son's old jeans.
The only desire is to keep the back pocket. It is nice with the red stitch lines.

Oh, you want to see the bag, do you? Here it is.

I have took some pictures during the sewing so now I am writing a tutorial.

First of all cut the seam of the inner side of the jeans.

Fold in half and cut the back part for the bag.

Note that the side seam is not in the middle. The front and back parts of the trouser's leg are not equal.

The front part is collected from different pieces including back pocket.
You can cut them where decide from. Or follow my way. These jeans were not so big and I have to be careful with cutting .
From other trouser's leg cut the pieces.


Sew right side together half inch seam allowances. First sew upper row.
Press seam allowances open and stitch zig-zag with a thread different color.

I have seen this method on Victoria Gertenbach's site
I love it and used different threads for the different seams.
Cut from the rests 2 pieces for the handles and add this way.
Press well.
To be completely green I recycled an used shirt for the lining.
Put a piece of the shirt under the bag's part and cut.
Sew the handles along - first the side seam then the middle.
Make some back stitches at the end of the handle and leave open for turning over.
I used a gray threat so it is not visible - I have pointing with the pencil.
Turn over and iron well.

Repeat the same with the other part. Then order them right side together and stitch only along the side.
Open the seam allowances and zig-zag only the denim fabric.

Turn the side seam 2" towards the middle and stitch the bottom. I recommend to stitch twice for more  strength and security.

Now it is time to connect the handles.
Place two parts of the handles and stitch the denim only.

Insert one part of the lining under another, pin and stitch. It is possible to sew by hand.


Repeat the same with the other handle.
The bag is finished.
I have added a button and piece of elastic for fastening when fold the bag.
 Sew inside the pocket.
Add a button under the bottom of the pocket.

How to fold? It is easy. Place on a flat surface, fold, roll up and fasten with the button.

It is time for shopping :)