Showing posts with label star. Show all posts

Saturday, October 9, 2021

The longest summer has ended

 I know it has been a long period without sharing any news.

At the beginning of this year I promised to me to write at least a post per month.

But the summer came and I have had no time for keeping the promises.

I have finished many projects some of them non quilting or sewing, but I am happy and satisfied with the results.

Anyway I am here and hope we will enjoy together again.

A 3D Christmas star has captured my thoughts many months because love too much geometry and EPP.


I have stolen some time to design it and write a pattern.


Made a star for a gift or for decoration. 

It is really funny.


Wednesday, December 9, 2020

A new look of EPP Moravian Star

 A friend of mine has shown me a beautiful star. This was first time I have heard about the Moravian star.

 It was EPP and seemed not so hard to make. I have GOOGLEd different images and realized that among big variety there is not a star with one colored points.


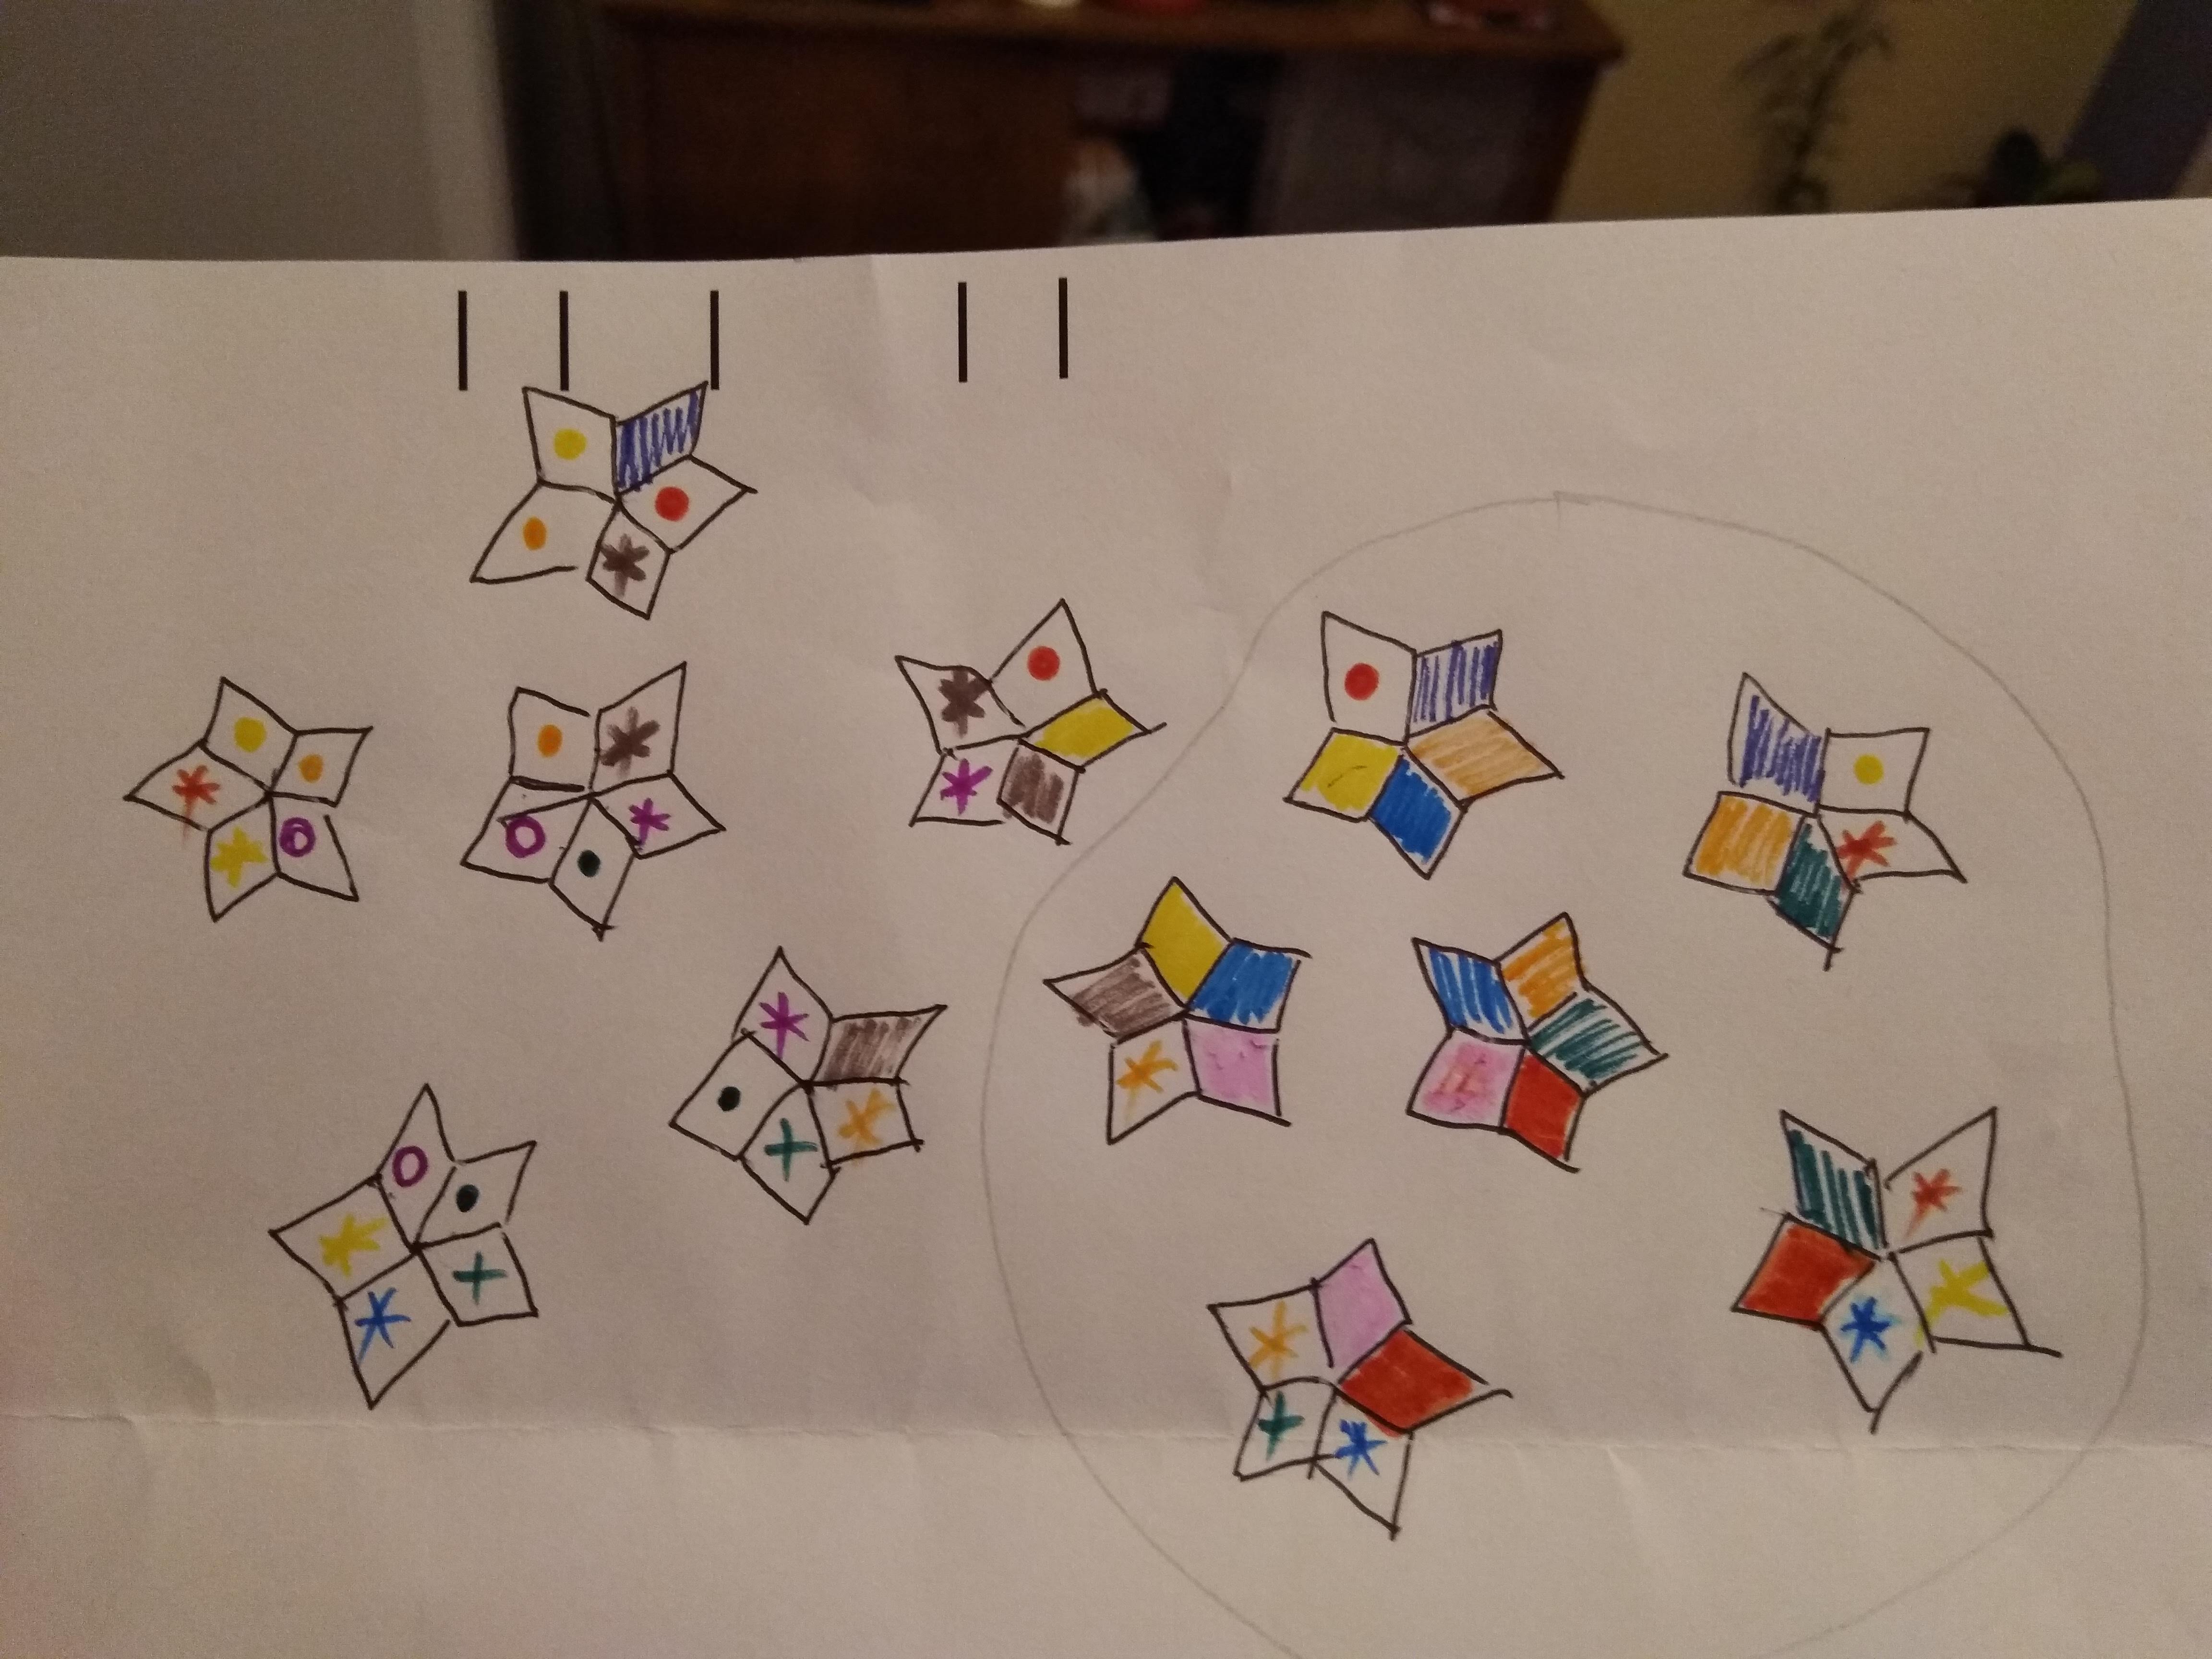
So I made a scheme with 20 different colors. You can download and print from HERE .

I have selected 20 Christmas fabrics, cut 60 cardboard templates and prepared the diamonds with glue- 3 of each fabric print. On the back side ( on the cardboard) I have placed a color sign that reminds me of the position in the star.


Then ordered the first side star and stitch all the diamonds right sides together.


 Keep in mind it the finished side star is not flat.


Gathering two side stars -  place the stars wrong sides together and stitch. After finishing the Moravian star the Moravian Star you have to leave the cardboards inside.


Repeat the same way to make one side star surrounded by 5 side stars - on the scheme I have circled with pencil. This is the first part of the Moravian star.

On the points where are gather three diamonds from one and the same fabric you have to fold the corners at 60 degrees - see the next picture.


Make the second part of the star - similar like the first one. 

Carefully gather keep in mind to align  the same fabrics at the points.


Choose one point to put a hanging cord.


Merry Christmas!


Sunday, December 3, 2017

The quilt - Hours before Christmas

Since my last post I was involved to create two quilts for Christmas.
Working on them was a real challenge for me.
Love the final result.


24 blocks as the days before Christmas, 12 clock faces as the hours of the day, 12 clock faces as the hours of the night. Each hour is so different.

After making the design I began follow the idea.
Collected  all white, green, red fabrics I have in my stash. Then added the gold printed ones.
I ordered them on the bed - almost 140. There are satin, taffeta, velvet, cotton fabrics.


First I began to make each block paper foundation. After sewing the second one I remembered about freezer paper. It was a perfect idea. - the work began going much easier.


Then I have made the second quilt.


 After sewing all the blocks I collected them and began thinking of quilting.

It has to be light and air.
I found a golden thread - perfect addition to the project.


The half of the blocks are with such star, the rest with different.


Final balance 22 white fabrics, 28 red and green, 2 golden - for the bindings.
I am satisfied.

Tuesday, January 27, 2015

Star coaster tutorial

I have seen this star in an amazing book - Carefree quilts by Joy Lilly.
There were described place mats, but the idea is the same.

All you need  for two coasters is:
  • two rectangles contrasting colors about 8 x 9 inches for the front,
  • two rectangles of batting about 8 x 9 inches 
  • two rectangles contrasting colors about 9 x 10 inches for the back. 
 Let's get started.

 
Step 1. Place the rectangles right sides up, align them and make two parallel cuts.


Change the middle strip and stitch two neighbouring pieces right sides together.


Step 2. Repeat step 1 with the new rectangles.
Pile the them right sides up again, align and make two parallel cuts.


Change the middle strip and stitch together.


Step 3. Repeat step 1 with the new rectangles.
Pile the them right sides up again, align and make two parallel cuts.
Keep in mind to align not the outer side , but points where seams crossing.


Note where the cutting line runs - you should have 3 similar triangles.


Step 4. Trim the tops to desired size.

 
Step 5. Cut batting and backing.
The back fabric must be 2 inches wider and longer than the top and batting.


Place as shown and quilt as you like.


Fold twice by iron and stitch.


Thursday, October 18, 2012

Wonky Double star

I can't believe that one pattern (designed by me) could change into another. With little help of me of course.
But I like the transformation. Very much indeed.
Do you like it? Might be in this orientation.
It is easy to sew. Believe me - all the seams fit perfect.
You can make in a Christmas version of course.
Get the pattern from here.