I have a friend of mine who has a birthday on 29 of February.
He needs a special gift.
I collect different leftovers and make a mat - long planned as a gift.
Good for me to practice some quilting stitches.
.
Showing posts with label place mats. Show all posts
Monday, March 7, 2016
Saturday, September 5, 2015
Coloring mat for adults
Have you heard about the new anti stress therapy - coloring books for adults?
And especially Johanna Basford's Secret Garden.
I had to sew mats and wandering about design.
I have looking at my fabrics when found this one - IKEA designed print very similar to the coloring pages.
Immediately imagined a mat like coloring page.
Two hours later I have a finished mat.
Are you interested how to do? It is absolutely fun and easy.
Let's started!
1. Cut a piece 13 inches long selvage to selvage.
2. Then cut a rectangle 10x13 inches (left piece on the picture). The right one we will use for transfer the drawing lines and at the end as the back fabric..
3. Cut a white rectangle 10x13 inches and stitched both pieces right side together.
Iron the seam open an you have a top.
.
4. Now it is time to transfer the lines from the printed fabric onto the white one.
If you have LightPad to transfer the lines use it.
I usually use a window glass in daylight.
Get the right piece from Step 2 and tape it onto the glass.
5. Adjust the prepared top from Step 3 to fit the print so that you can see the complete drawings.
6. Now transfer some of the lines with Trick Marker self-erasing.
7. Cut a piece of batting bigger than the top, sandwich and FMQ with black thread.
8. Place a piece of fabric for back, stitch in the ditch and make a binding as usual.
Now you have a finished mat!
You can use any similar printed fabric with drawings if not have IKEA design.
Monday, July 14, 2014
Linen Table topper
I have spent some hours to wander which color scheme will work better to their interior and decided on green brown beige linen.
It was fun to sew the topper, so here are some directions how it was sewn.
The size depends on what you want for the finished project. Mine has to be 23 inches.
The center square is 14 inches. You could make different size if needed.
Cut 4.5 inches stripes from four different linen fabrics.
Then cut them into pieces about 2, 3 or 4 inches, order as you like and sew them right side together in a new strip.
I have place them next to the central square and found that a dark brown strip will be proper addition.
Cut 1.5 inches strip and sewn.
Then add pieced stripes to any of the sides.
The finished top.
Add batting and backing.
Stitch in the ditch, trim to desired size and binding.
I have red many quilters use Elmer glue to fix binding.
I have ordered one bottle to test how it works. And I have received four bottles for my birthday.
Honestly say this is the fastest way for perfect binding.
First attach the binding strip on the top and folded it by iron.
Put some glue on the stitch.
Fold and press.
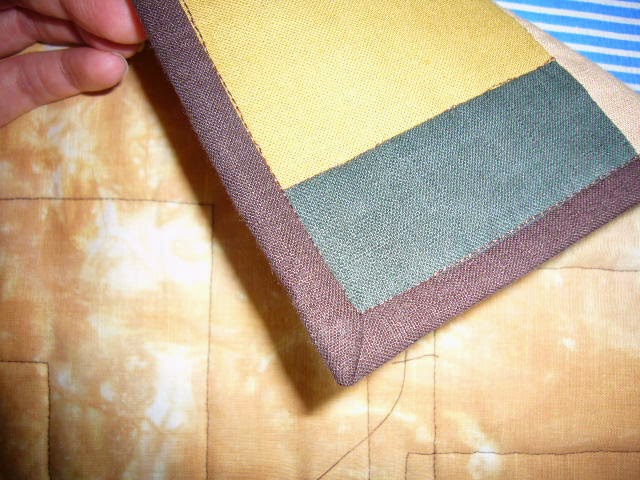
Stitching on the face I didn't care about the back side.
Look at the result.
The seam on the back is on the right place, too.
Finished topper.
P.S. See another variant of stitching binding with Elmer glue on Craftsy here.
Subscribe to:
Posts (Atom)