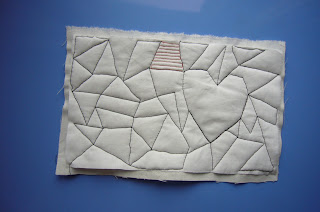
Quilting on scraps sandwiches look not attractive idea. Then try to make mug rugs with different motifs and shapes.
Yesterday was 14 of February so I made it as a gift for a friend with Golden Heart (used golden thread when quilting heart).
Cut a piece of fabric 10" x 6" or get something nearly this size.
Lay the back fabric 11” x 7” right side down, bating 11” x 7”and this piece.
Sandwich three layers with basting stitches.
Later you can use safety pin for basting but now you would feel more comfortable with thread basting.
Use running stitch to make a heart on the right side - the shape is free. This will help you when reach the area with FMQ.
Put the darning foot and quilting needle (optional). Drop the feed dogs. Thread the needle a black thread.
On a piece of paper try to draw shapes - triangles and quadrangles. This will help you later when began drawing by machine.
Begin stitching from the left side - I began at down corner.
Cover all the surface. Don't worry about the shapes.
Keep in mind to make straight lines.
A the end you will have something like a web.
With a color thread (mine is orange) began stitching parallel lines.
Choose another shape not so close to this to repeat.
To avoid permanent changing of bobbins and upper thread I filled 3 or 4 shapes this way.
Thread another color and do FMQ. Notice that each time I fill different direction - parallel to the black sides.
Make this exercise till you fill most of the shapes. I leave some of them blank.
I decided to finish with a thread for knitting. I have red about this method but haven't remember where.
Draw a line for the place of the thread.
Set your machine to zig-zag stitch. Change the foot.
Place the thread under the foot and began stitching following the drawn line.
Stop when reach the corner in needle down position, pivot , turn the threat without cut and follow stitching.
When come to the beginning cut the edges and finish zig-zag.
Carefully trim the excess fabrics and batting with scissors.
Repeat zig zag stitching along the edge once again.
You are finished.
Look at the back. I have the same picture.
If you want to have an embroidered logo at the corner as I did you have to do this a the very beginning - before sandwich the mug rug.
P.S.
OMG! I have found the site I have red about the Edge finish tutorial.
If you have not understand my explanations ;)


No comments:
Post a Comment