Wednesday, November 27, 2013

The winners from Thanksgiving Giveaway


The Thanksgiving GIVE-AWAY is closed

Thank you all for entering. 

I used a Random Number Generator to select the winners.


 Congrats!

The most interesting case is the situation with Michele.
She wrote me an e-mail she could not add a comment.
I appreciate her will and sent her a copy of pattern.

Thank you, dear Michele for the interest. 
So I have a thanksgiving day, too :)

Don't forget to check for new patterns paper piecing blocks and mug rugs.
Right now I have added a snowman.


Happy Thanksgiving to all!


Friday, November 22, 2013

QAYG Christmas quilt - join two pieces of blocks


Some people have design wall, I have a design carpet.
So funny. The Christmas quilt is big enough and I put the blocks on the floor to think what has to be the next one.

I have to look at them from distance.Do you know what is the solution?
Climbing on a chair :) This way I looked at them from above.

For this Christmas quilt I decided to put puffy batting to add more volume.
So the traditional quilting will be a little more difficult for me because of my sewing machine.
I love the OAYG way that explained Mari from TheQuiltingEdge and want to use it.
The little difference is my puffy batting.
So I leave a little bit excess around blocks with idea to use it instead of adding additional joining strips of batting.

I have cut 2,5 inches strips  ( finished width 2 inches|) dark brown with snowflakes for the front and beige for the back.
Stitch the back one with running stitch by hand at quarter inch from the edge of the left piece of blocks.
Use the white thread to see better.


Then put the front strip on the top right side together.
Began stitching keep in mind to follow running stitch. I have used my walking foot - there are 4 layers of fabrics and one batting.


After finish sewing cut away exceed backing fabric.
Repeat the joining to the right piece of blocks the same way.
Keep in mind to align the beginning of the strip and the blocks.

back and front


Cut away the exceed backing fabric.
You will have the same look ( if wander these are the blocks at the end of the strips.)


Lay down the batting first one side the another. If somewhere there is a bulk tear some batting away.
Close the front strip - the dark brown one on the batting.


Iron carefully. From the high temperature the batting smelts a little and became a whole piece.
Fold the strip a quarter inch seam allowance and pin. Repeat along all the length.

Stitch along  the two edges. If want make some quilting for secure the batting.

 The final look


and the back
I have continued with others.
Wait soon for the final result.


Thursday, November 21, 2013

Thanksgiving give away

Welcome to everyone hopping around in blog land for the  BLOG HOP party.
Michelle from Quilting Gallery organized this Thank You blog hop party with Give-Aways!

thank-you-blog-hop-party 
 
I always like the idea of this day - to say THANK YOU to somebody.
So I have designed this modern mug rug.
I am offering TWO Mug Rug patterns - Modern Thanksgiving Callout.


More detail about pattern

To enter the giveaway, leave a comment telling me  
Who you want to say Thank you! and why?


Bonus entry: followers, new and old, please leave a second comment.

I'll close Give away on November 26 and will announce the winner (chosen by Random generator) here on my blog and by email no later than  November 28.
Please leave one comment on this post by November 26.
If you like my blog you can follow me for more interesting ideas, tutorial and patterns. 
Good luck!

The give away is closed - the winners are chosen here.

Sunday, November 17, 2013

Christmas time - Time for gifts


I was asked by my customer if I have a simple star.
Here it is - a gift for Christmas.
It is FREE.
It has 4 different variants and many possibilities to arrange.

This PDF quilt pattern is 6" (15,2 cm) square block .
There is a percentage table if you need other sizes.

This cute block will be a perfect for your quilt/patchwork creations - quilt, wall hangings, totes, placemats, cushions and many items you create.
Make mirror copy and sew stars different sizes.

Enjoy Christmas!

Tuesday, November 12, 2013

Christmas quilt - part2

The fun continued at the weekend. My first plans and drawings changed. Not generally, but some new ideas looked better when began ordering finished blocks on the floor. Yes, on the floor. My design wall is small fo this project, so the only possible place is the floor in my room. So sewing in one room and collecting in another. I have walked about a mile from one to another :)

Two of the fabrics has small printed Christmas tree, so the idea is using them as a bigger trees.


But my pride is 18 inches square Star of Bethlehem (18,5 inches including seam allowances)


It is easy to construct.

See the next pictures.

Step1.
First you have to sew a 9 inch star. (9,5 inches including seam allowances)

Seam allowances are included in measures.

 You will need only 3  patches A. On the place of the fourth we will insert a tail.
 There is Y seams, so be careful with stitching together.

Step2.
Cut two rectangle 7 x 9,5  inches.
My green fabrics are very similar - only the red stars are the difference, so I decided to separate them and add a white strip 3/4 inches width.


Step3.
The tail of the star.
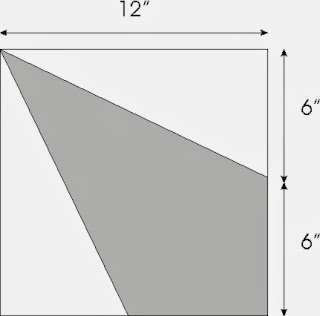
Add a quarter inch seam allowances. 12 " is finished size of the block.


Step4 
Assembling the star.
So you will have these parts.

First sew short sides of the rectangles to the star.


Then add the tail as you have added part A in basic star - with Y seams.
Enjoy the final result.


Saturday, November 9, 2013

Christmas quilt project

I began a new project - Christmas quilt for a bedroom.
The idea is to use green, red and brown colors.
I have found some beautiful Japanese fabrics with golden prints.
The biggest difficulty is to buy enough quantity of fabrics, because I have to buy them before making a plan for the top.
I have drown many ideas that is suitable for Christmas and for the fabrics full of stars.
The size of the blocks will be 6, 12, 18 inches. In addition I  will use some strips because one of the fabrics is striped.


Anyway I began cutting and sewing yesterday.

The first one


 Then comes


Number three is my favorite


Next 

 
 Tomorrow the fun  will continue...

Tuesday, November 5, 2013

Moustache Christmas tree mug rug

When I have seen this Christmas tree on a street poster I haven't realized how great is the idea.
I made a mug rug and what a surprise - so many people like it. Here is the pattern.
You still have time to sew a present for a beloved one.


You could see a tutorial for binding here.
What funny fabric used for backing.


Thank you Jenn for buying it for me.

Sunday, November 3, 2013

Thanksgiving Day

It is great to have Thanksgiving Day!.
I our live we are grateful to many people, relatives, friends, even enemies.
Yes, enemies. Sometimes we have learned the most important lessons when have enemies.
We became stronger and wiser.
In my country we don't celebrate such special day.
So I like the idea that inspired me for modern way to say THANKS!

 
I have made a mug rug with internet slang 10x!
The pattern is on ETSY and CRAFTSY as usual.
Easy and fast project for making a gift and say THANK YOU!