The fun continued at the weekend. My first plans and drawings changed. Not generally, but some new ideas looked better when began ordering finished blocks on the floor. Yes, on the floor. My design wall is small fo this project, so the only possible place is the floor in my room. So sewing in one room and collecting in another. I have walked about a mile from one to another :)
Two of the fabrics has small printed Christmas tree, so the idea is using them as a bigger trees.
But my pride is 18 inches square Star of Bethlehem (18,5 inches including seam allowances)
It is easy to construct.
See the next pictures.
Step1.
First you have to sew a 9 inch star. (9,5 inches including seam allowances)
Seam allowances are included in measures.
You will need only 3 patches A. On the place of the fourth we will insert a tail.
There is Y seams, so be careful with stitching together.
Step2.
Cut two rectangle 7 x 9,5 inches.
My green fabrics are very similar - only the red stars are the difference, so I decided to separate them and add a white strip 3/4 inches width.
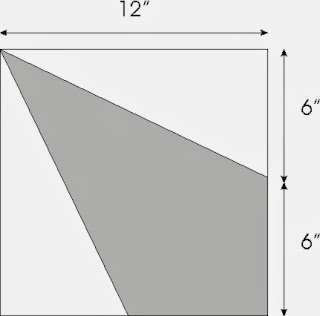
Step3.
The tail of the star.
Add a quarter inch seam allowances. 12 " is finished size of the block.
Step4
Assembling the star.
So you will have these parts.
First sew short sides of the rectangles to the star.
Then add the tail as you have added part A in basic star - with Y seams.
Enjoy the final result.


No comments:
Post a Comment