Tuesday, January 27, 2015

Star coaster tutorial

I have seen this star in an amazing book - Carefree quilts by Joy Lilly.
There were described place mats, but the idea is the same.

All you need  for two coasters is:
  • two rectangles contrasting colors about 8 x 9 inches for the front,
  • two rectangles of batting about 8 x 9 inches 
  • two rectangles contrasting colors about 9 x 10 inches for the back. 
 Let's get started.

 
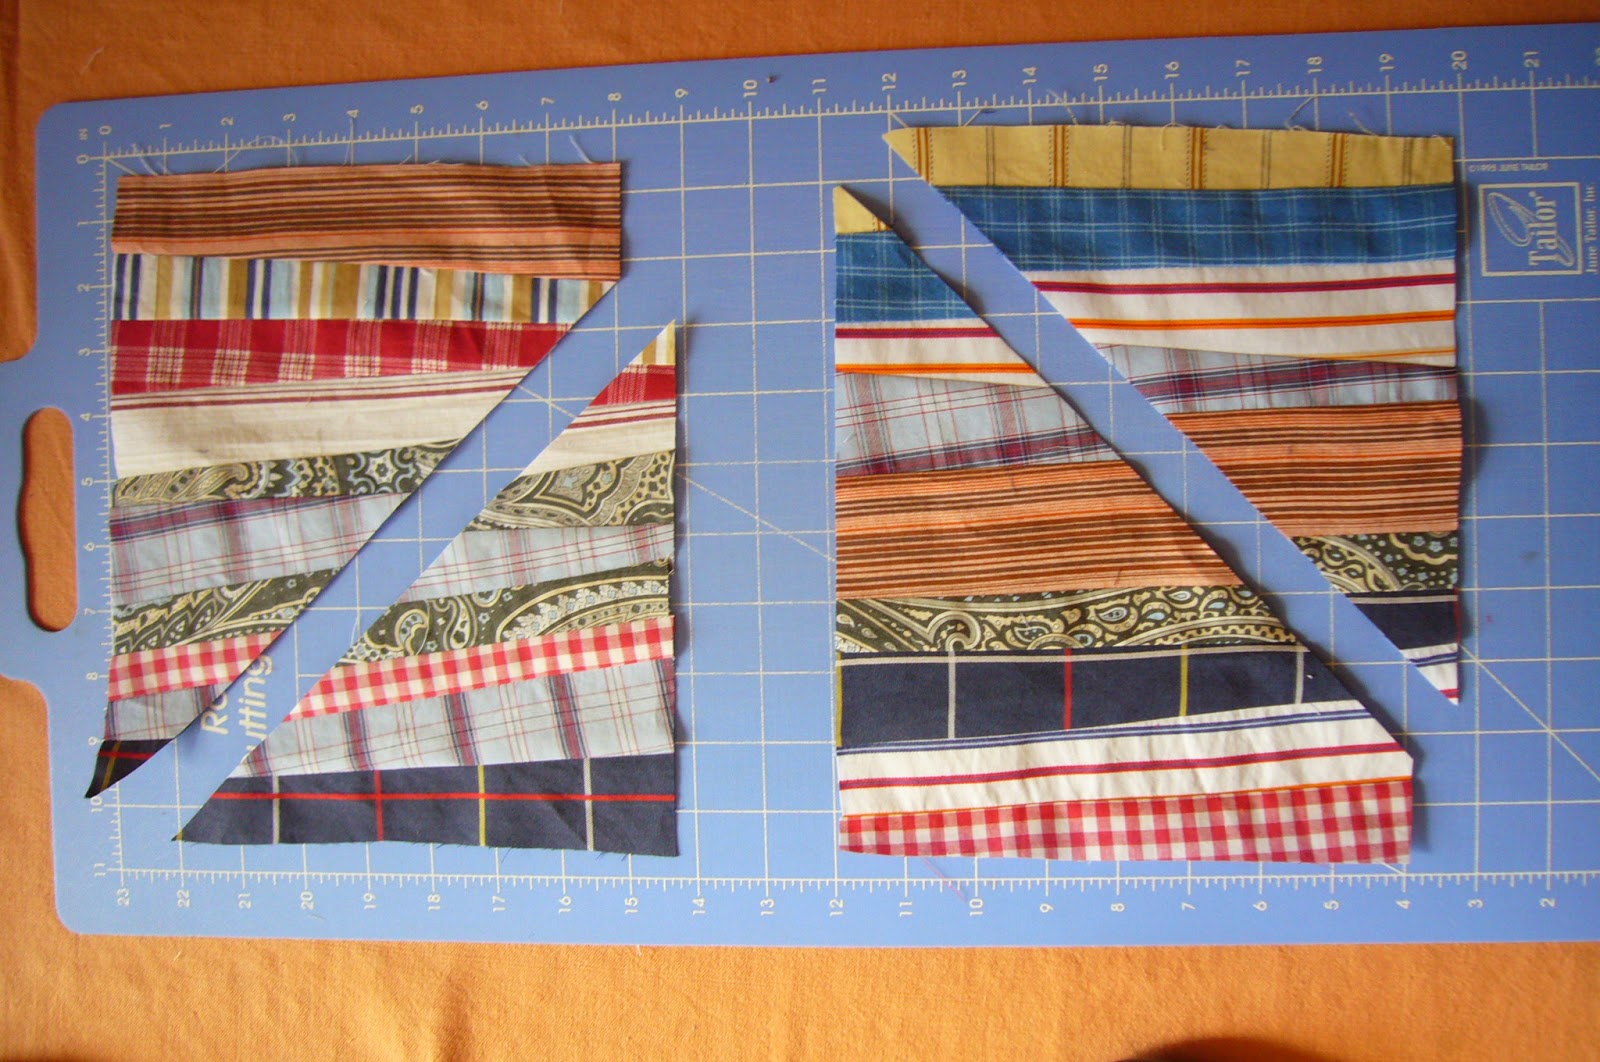
Step 1. Place the rectangles right sides up, align them and make two parallel cuts.


Change the middle strip and stitch two neighbouring pieces right sides together.


Step 2. Repeat step 1 with the new rectangles.
Pile the them right sides up again, align and make two parallel cuts.


Change the middle strip and stitch together.


Step 3. Repeat step 1 with the new rectangles.
Pile the them right sides up again, align and make two parallel cuts.
Keep in mind to align not the outer side , but points where seams crossing.


Note where the cutting line runs - you should have 3 similar triangles.


Step 4. Trim the tops to desired size.

 
Step 5. Cut batting and backing.
The back fabric must be 2 inches wider and longer than the top and batting.


Place as shown and quilt as you like.


Fold twice by iron and stitch.


Saturday, January 10, 2015

Summer breeze quilt

Sometimes our plans are far away from reality. Our desires and expectations looks like impossible dreams.
This quilt was began in September immediately I finished my short holiday trip to the seaside.
At the very first beginning I intend to make it using a paper pieced block. But looking through my stash I was "caught" by blue white striped fabric.
Cutting was so funny as a kids playing.
Start with two squares, cut diagonally, sew together, cut striped triangle and attach.Rotate, viola!
Finished block.


 If you wander how to optimize cutting when don't know the size and hate calculating simply follow this simple tip. Place the finished half block, align to the strips and cut.
No rotary cutting, just scissors.


I trimmed finished block to desired size later.
Thanks to my EQ7 I decided on 16 block top and mitered boarders.


The quilting should be light as the air at the sea side.
I made stitch in the ditch and diagonal quilting on white squares.
What about boarders?
I free motion a winding rope.

The last thing - binding. It took me 1 hour before I was advised by a friend for BIAS binding.


Look how nice it is.


The whole quilt


Last week I found time to write a pattern and now it is available on CRAFTSY and ETSY.

If you wandering what the back is. Here you are.


Want to paper piece the boat?
Simply draw this block on a paper and paper piece. It is mirror image =
I have put the numbers. You have to decide on the size only.


ENJOY!


Tuesday, January 6, 2015

Recycling

Happy New Year!
I wish you 365 days full of creative ideas and joy!

I received an question from a reader about this post, so I want to explain a little bit detailed here.
It is a geometry question, but I am glad to help Suzy and everyone who need additional explanations.


The question is  - Why I cut off the centre?

When I collect strips different width at the end I have a rectangle, not perfect square. So I have to cut off centre. See the diagram I have attached.


Why I use rectangles?
If I trim to square the last strip could be too narrow so I prefer to leave it as it is. After cut diagonally and rejoin I could trim to desired shape I need.
Usually I use the block as they are and if needed add strips to adjust the size.
Hope now it is more clear.

Good luck to everyone who want give a try.