Monday, November 28, 2016

My last baby quilt - fast design and speed sewing


I have to make a baby quilt only for one day from the fabrics I have.
It seemed difficult to me - I like slow designing and sewing with touch of perfection.
This time there was no place for dreams and I had to sew fast.
It has to be 25 x 35 inches, so I realized I need 9 paper sheet A4 size.

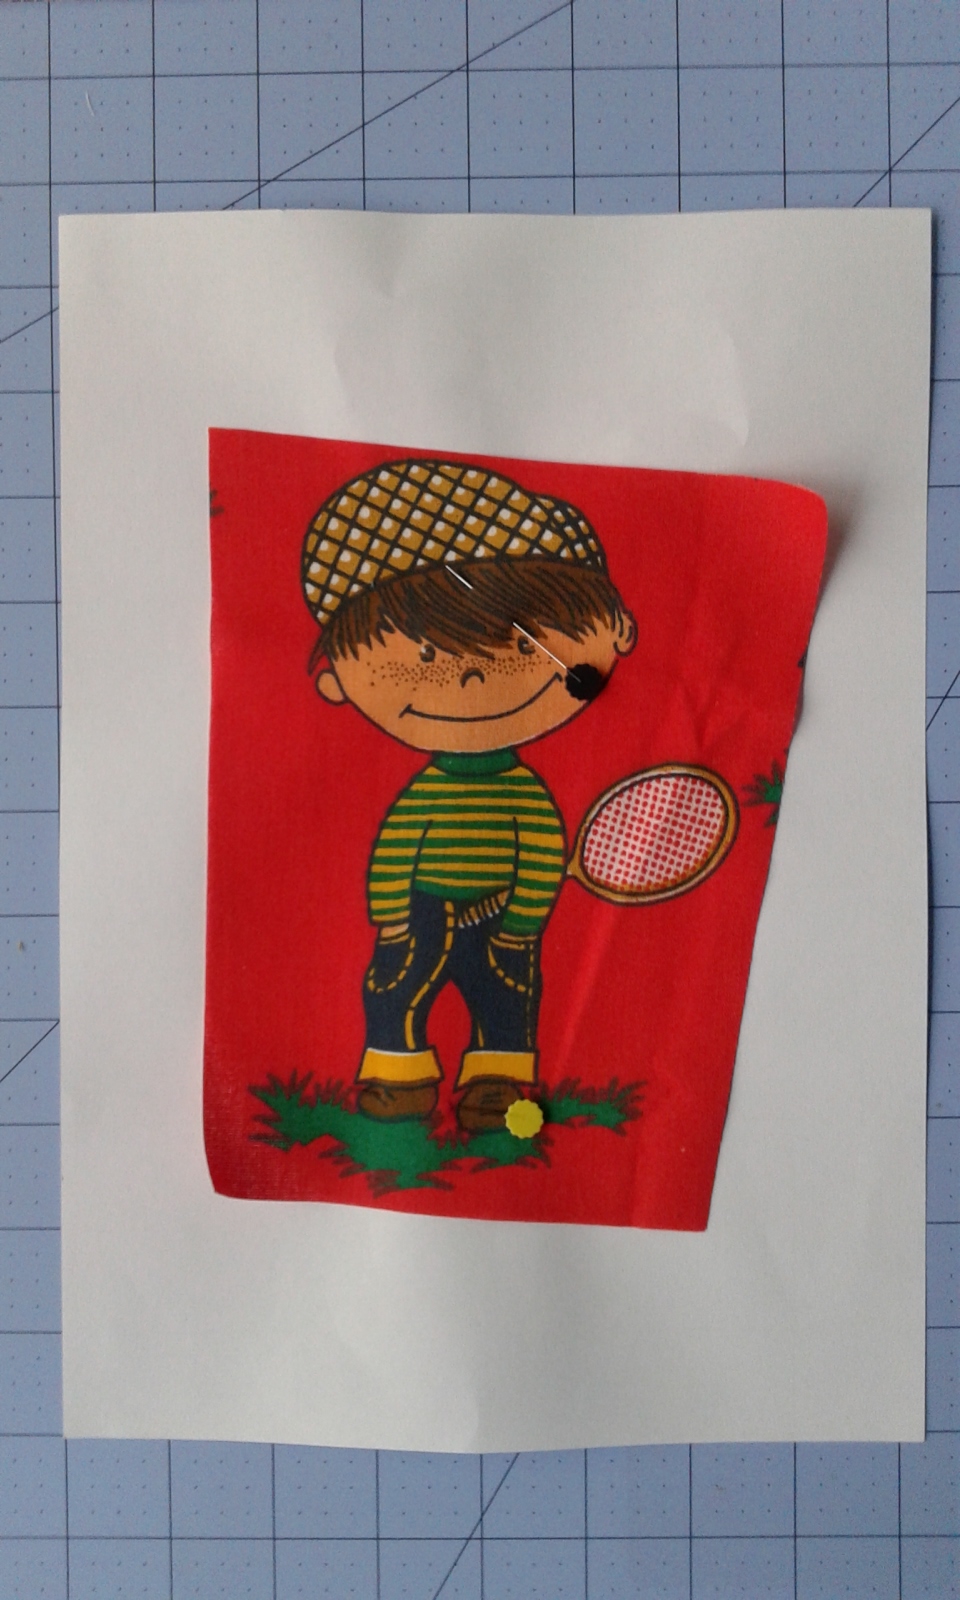
I found a fabric with a boy and girl printed on it. It was a small piece - only 10 inches strip.
Trim around a girl and a boy and add some stripes from my leftovers.
It is easy to make with help from a sheet of paper.
Place the piece and pin.

Align a strip on the left right side together. Stitch.


Open and iron.

Repeat with next long side (the right one).
Pin both stripes and place a new strip on the bottom.

Then repeat with the top. As you see I trim the exceed fabrics after stitching.
I use scissors - no measure of 1/4 inch seam allowances.

Here is is.

On the back.

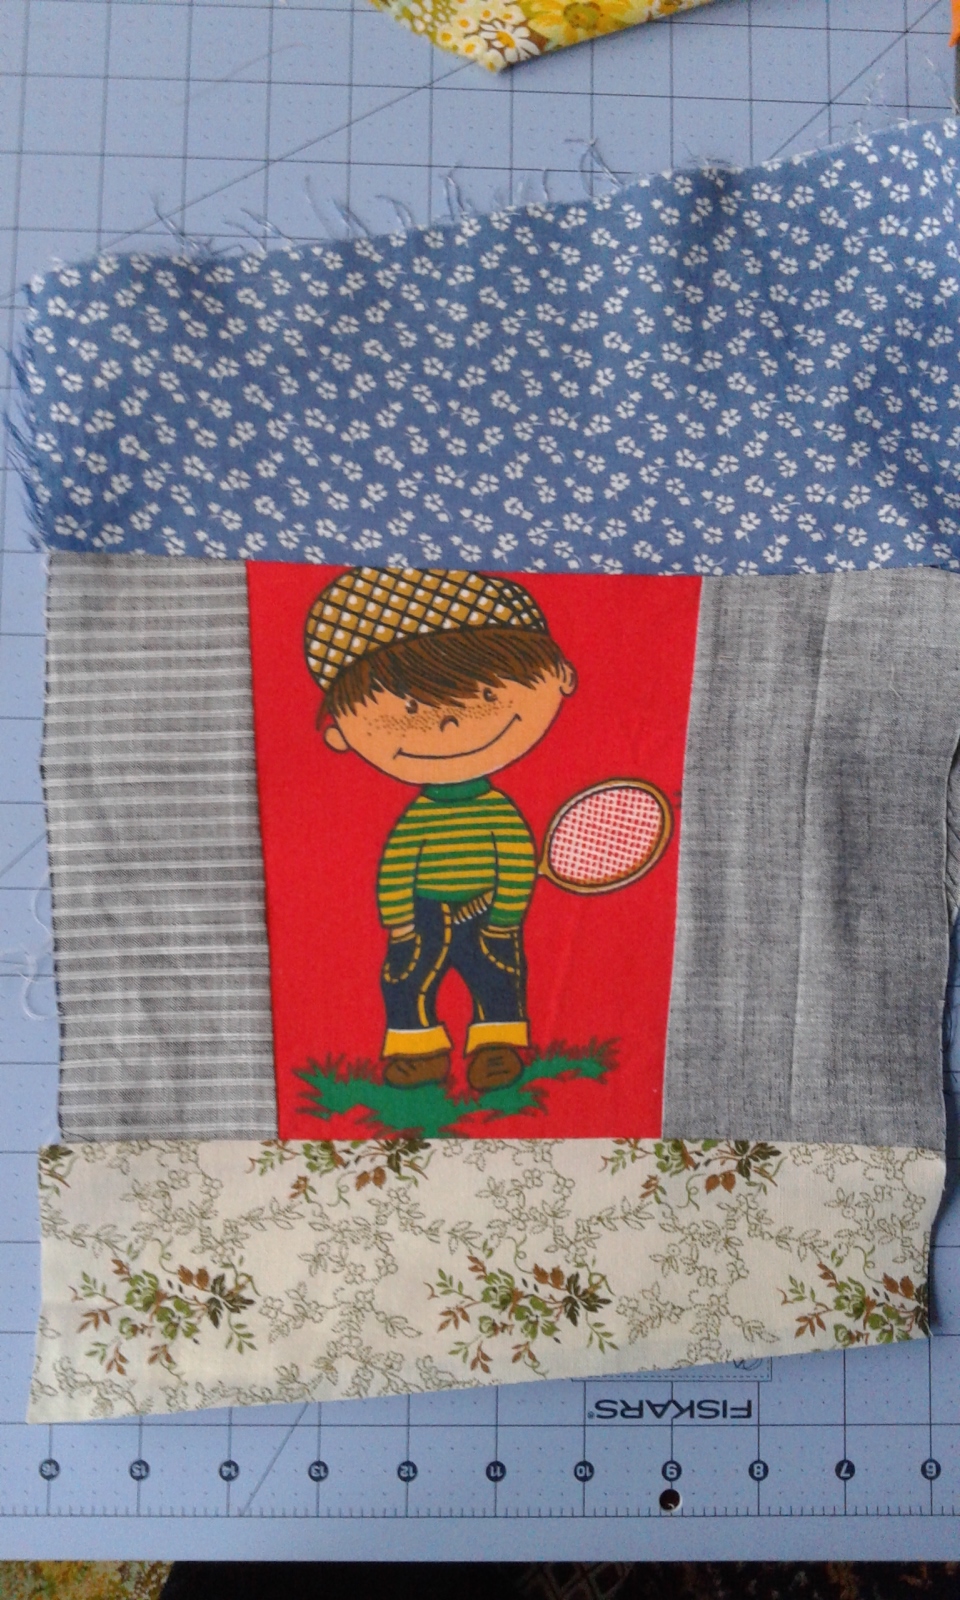
Now make the final trimming at 1/4 inch.
Easy and fast block - it take 10-15 minutes.


I made the other with a girl the same way.


Next blocks should be Stack&Whack wonky blocks from 3 pieces.
Place three rectangles of fabric and make two cuts.through all three layers.


Combine the three pieces of each layer and stitch together.


 Don't worry of uneven pieces - trim to desired size - now it was 9x6 inches.


 Repeat with other two blocks.


Here is a detail


"Let it sunshine..."
What a nice title of this quilt!


Monday, November 14, 2016

A lettter in a hexagon - tutorial

My interest in making letters has new shape - letter in hexagon.
I love making tiny things, I adore mini quilts.
Last year I have designed another Hexie alphabet.
Now I finished the new one.

Let me introduce the letter A


 The letter B.


                                                                                 The letter C.


Here is the whole alphabet. You can get the PDF pattern .


How to do a letter...

Each letter is made first by paper piecing and then by English paper piecing.
Print  the pattern and cut the hexagons.
Set the machine stitch length to shorter than usually you sew - somewhere between 1,5 and 2.
Keep in mind - with small length you will easier tear off the paper, but if there is a need to rip a seam you will be in a trouble.

Step1.
Prepare pieces for the background :
  • two pieces - 1 x 2 inches 
  • two pieces - 1 1/2 x 1 1/4 inches 
  • a small piece round 1 x 2 inches for the inside of the letter.
Use a 1/2 inch strip for the letter. It is easier to work with strip instead of small pieces.


Step2.
Use a source of light - the sun, a lamp etc.
First seam will be between area 1 and area 2.
Place first piece wrong side to the paper to cover the area 1 and pin. Then place the strip right side together and repin. Keep in mind that after sewing a seam and turn over the strip, it must covers the area 2.


See how it looks like on the back side.

Sew a seam between 1 and 2 starting1-2 stitches before and ending 1-2 stitches after. If prefer make a backtitch.
Cut the strip align to the previous piece, turn over and iron.


Trim the seam allowances to less than 1/4 inch. No need to use rotary cutter - simply use a scissors.

Step3.
Repeat the same steps to cover the whole letter.
Using a strip for letter is very tricky - look at the next photo.


After you position the strip you can easy control its direction.


Add the next four pieces the same way - first left and right.
 

Then up and down.


Now you should start and finish stitching a quarter inch wider than the paper.


This letter is one section, so it is very easy to follow the numbers.
When the letter is two sections simply paper piece the letter and then proceed from this step forward.

Step4.
Now you have a finished hexagon. Trim a quarter inch seam allowances.


The front look


Step5.
Tear off the paper carefully.
Place a one inch paper hexagon in the centre and make EPP the way you prefer.


Use the letters for small project, to personalize pouch, mug rugs etc.
Happy sewing!

Wednesday, November 9, 2016

The quilts' finishing

Almost one month I have been working on two similar quilts.
Having an challenging order I really satisfied with the final result.


The design is quite simple.Log cabins in three sizes - 6, 12, 18 inches.
Both quilts are the same order only the places of same colored squares are different.


I enjoyed myself making different backs.


Here I make the binding - the most pleasant task when all is finished.


The most interesting fact here is the way I have chosen fabric for the binding.
I wandered between white/black striped or checked fabrics.
Suddenly I had seen an IKEA fabric I hadn't put into the box.


I realized that cutting stripes will change totally this look.
Now I have two favorites IKEA fabrics - the "written"   for the backs and this one for the binding.

Tuesday, October 4, 2016

Don't tie a bow tie

I was challenged to make a bow tie.
Till now I have many attempts to sew different clothes and accessories.
Creating unique dresses is pleasant and funny hobby.


This bow tie is not classical one - you have not to be an expert in tying.
It is ready to wear. The closure is with velcro.


It was very easy to sew - you will be finish in less than an hour.
I wander to write a pattern. Are you interested?

Thursday, September 22, 2016

In the beginning there was a Rose

Sometimes I finish my works very fast - at once - for some days.
Sometimes it took me months to find the perfect result.
But anyone has his UFO's, have you?
I am so proud when found these stripes to frame my rose boarder from Road home Row along.
I think they are gorgeous - the rose as a piece of endless ancient boarder.


Now it is on my design wall waiting for inspiration for quilting design.
Do you have any suggestions?

Sunday, September 18, 2016

Wall pocket organizer

All emotions about my participating in Road Home Row along are in the past and I played yesterday with a wall organizer for dear friends of mine.
I have some leftovers from worn jeans and began cut and sew spontaneous.
Pockets - they have to be on the wall organizer.
Two of them I used direct from the jeans.
The third one was made very fast and easy from a piece of organza and a piece of batik fabric.
To prevent fraying of organza I burned the edge by a soldering iron.


The closer view.

There are left the buttons only from this pairs of jeans, but I have idea to use them, too.
Visit here soon to see this project.
Happy sewing!