Sunday, July 27, 2014

Next baby quilt - enjoy imperfection

Well I haven't written here so long, but had to do many different works.
Some of them were interesting, some were boring.
The sewing and quilting have special place in my life, so I began each new project with much joy.
A friend of mine will become a grandmother. What is the most beautiful present?
The baby quilt, of course.
She wanted something simple and unique.
I don't like repeating blocks. I am bored with this.
Sewing my way is a little bit slowly, but building blocks is interesting and surprise is always round the corner.
I could change something as I go. Probably I have to call my way CAYG (change as you go) similar to QAYG (quilt as you go).
Do not think I have no idea at the very first beginning what will be the final quilt.
I choose the fabrics and colors carefully, but I keep always my mind open for ideas born at the process of sewing.

The finished top.


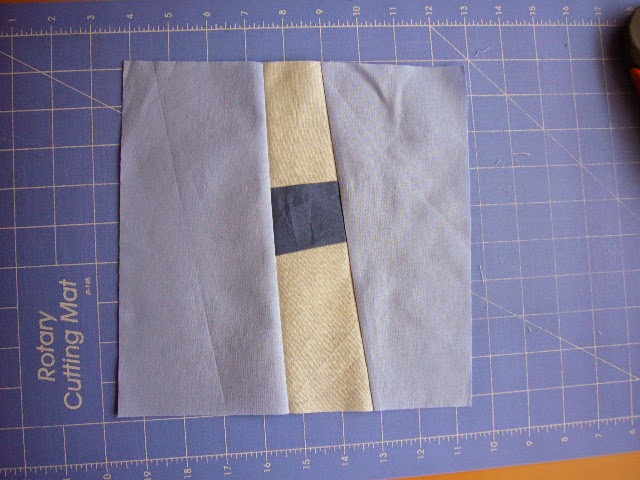
 As you see strips and squares are randomly placed at the middle or at one side of the block. the same with contrasting little squares.
So enjoy cutting and sewing. You are not obliged to follow perfect cutting keep in mind any quarter inch.


For one block you will need:  
10" square basic color
a strip about 9" long width around 2 - 2.5" white color
2" square contrasting color


For beginners
 1. Place the 10" square on your mat and make a cut randomly.


2. Divide the white strip, insert 2"square, stitch, press and trim.
Don't worry if the strip is not perfect. Mine is 2" at on end and 2.5" at the other.
This will make interesting variations at the end.


3. Insert the strip from step 2 and stitch right side together. Don't worry about uneven sides. You should have enough fabric to correct them. Press well and trim to 9"


The first block is finished with no stress and complicated calculations.

4. Repeat this with next blocks.

For my baby quilt I need 16 blocks. My plans were to add wide 4" boarder.


For intermediate quilters

Probably you noticed that if you insert uneven strips the grain of the fabric won't be edge of the block.
For first attempt and beginners quilters the perfection is a goal, but for you it is a must.
Now we started from the strip.
1. Place the srtip on your mat and cut along the grain one side.


The contrasting colored piece is trapezium.
2. Place on the strip aligning to the bottom and cut following the right sight.

  3. Sew them right side together and press. Notice the bottom is straight to the grain.


 4. Place the part of the strip next to the piece from step 3.
You see the difference. Make a parallel cut and stitch together.


 You will have a strip with perfect "grained" edge.
If needed trip the upper side.

5. Repeat the same technique to the whole block.
Here the right side is cut to the grain.
Place as you wish the strip and cut..


Stitch together, trim and press.


6. Place the remaining piece and align to the bottom.
Make a parallel cut.


7. Sew together, press and trim to 9".
You will have block with perfect grained sides.


8. Make next 15 blocks the same way.
Order all blocks as you desire and sew them together.
Add boarders up, down and at the both sides.

Add batting and backing, quilt and bind.
I have collect all pieces for the binding strip and it is very funny.


Enjoy sewing and quilting!

Tuesday, July 22, 2014

Giveaway Christmas in July

I don't like Tuesdays.
Honestly I hate them.
Sometimes working on a project on Tuesday is going so badly that I  stop all activities and get a book.
May be I have to give a gift, so I will run a Giveaway to break this.

Attention, please!
to ALL quilters
Today is the start of the RightPatterns' Give-away to celebrate the Christmas in July.
It is running from 22th July to 1 th August 2014 .
The winner will receive my most successful pattern Mug rug pattern Moustache Christmas Tree.


To enter this giveaway, leave a comment telling me
When you start your preparations for Christmas?
Bonus entry:  followers , new and old, please leave a second comment.
I will close Giveaway on 1 th August 2014 and will announce the winner (chosen by Random generator) here on my blog and by e-mail no later than 3 th August

Good luck!
P.S. 
If you are interested in the pattern, but are not the lucky winner download the pattern from HERE.

College days Blog Hop

The day has came. It is my turn.
I was very excited when Soma from Whims and fancies invited me to participate in this blog hop.
This was a sign that someone has noticed my work and like it.


At the beginning I have no idea what to make - we have freedom for any quilting technique we decide.
The idea came one night when sitting in front of my notebook and reading some posts on my favorite blogs.
My old desk lamp (from my students' years) had lightening a spot on the desk.
I remembered the time when had red books and learned formulas.
This should be the block - "Old time learning".

It was born too fast and on the next day I tested it with fabrics.
"Liberty" fabrics for the lamp, printed newsletter in red and black from my dear friend Elnora, green yellow purple from my stash.
Here it is.


The block is 10 x 10 inches finished size. You can download the pattern from CRAFTSY for FREE!
It will remain free from July through September 2014.


I love to see finished blocks made with my patterns! You could upload picture of blocks at my Flickr group.
Or you can share your picture in the Flickr group for the blog hop!

Thank you, Soma, for joining me in College Days Blog Hop!
It was such a fun!
Happy sewing!

Monday, July 14, 2014

Linen Table topper

Finally comes the time to make promised table topper for my  friends.
I have spent some hours to wander which color scheme will work better to their interior and decided on green brown beige linen.


It was fun to sew the topper, so here are some directions how it was sewn.
The size depends on what you want for the finished project. Mine has to be 23 inches.

The center square is 14 inches. You could make different size if needed.

Cut 4.5 inches stripes from four different linen fabrics.


Then cut them into pieces about 2, 3 or 4 inches, order as you like and sew them right side together in a new strip.


I have place them next to the central square and found that a dark brown strip will be proper addition.
Cut 1.5 inches strip and sewn.
Then add pieced stripes to any of the sides.


The finished top.


Add batting and backing.
Stitch in the ditch, trim to desired size and binding.

I have red many quilters use Elmer glue to fix binding.
I have ordered one bottle to test how it works. And I have received four bottles for my birthday.

Honestly say this is the fastest way for perfect binding.

First attach the binding strip on the top and folded it by iron.


 Put some glue on the stitch.


 Fold and press.


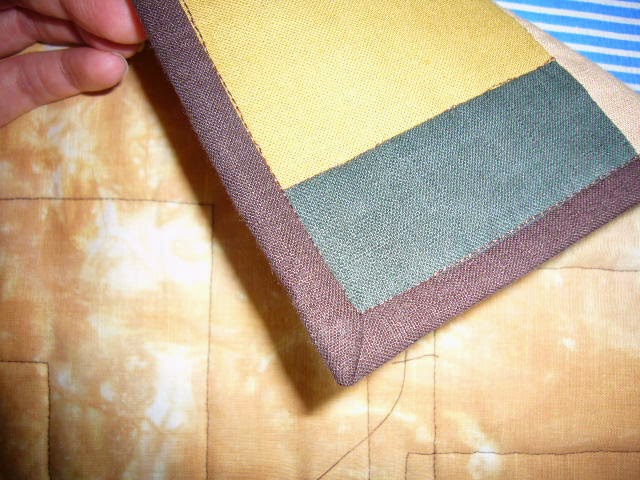
Stitching on the face I didn't care about the back side.
Look at the result.


The seam on the back is on the right place, too.


 Finished topper.


P.S. See another variant of stitching binding with Elmer glue on Craftsy here.

Tuesday, July 8, 2014

Paper pieced Owl family

After designing my blocks I do my best to color them attractive. 
Sometimes my efforts are successful and the result is amazing.
Sewing them I discovered many possibilities for combining fabrics.
The best award for me of course is to see your finished blocks.

Look at this interesting decision.


Aren't they beautiful? 


Tuesday, July 1, 2014

College days - free patterns at blog hop

After all this time waiting, it’s finally here!!! 
College Blog Hop hosted by Soma of Whims and Fancies!!! There will be many free patterns.
Visit the site to see all famous pattern designers who are involved in this fun.

This is first Blog Hop I am invited to participate in.
Incredible!
My date is 22 of July. So don't forget to check for my FREE pattern.
I intend to make a giveaway for you my readers - old and new ones :)

You are welcome!