Thursday, December 25, 2014

Christmas stockings everywhere

Well finally I have enough time to tell you about how I have made Christmas stockings this year.
I had to make 4 of them by order (the lady from last year wanted to have some).


I have many ideas for the front side, but the back should be made faster.
So I cut 4 different fabrics bigger than pattern  (around 1 inch seam allowances) and lay them right side up.


Then made 3 cuts.

And jumble the pieces .

If the fabrics are printed you will have stockings "one direction" only.
I have used woven fabric so could turn one of the stocking.
Stitch the pieces together.


Add batting and quilted. Trim to the pattern size.

For the fronts I have made the lights

and used even small bells.

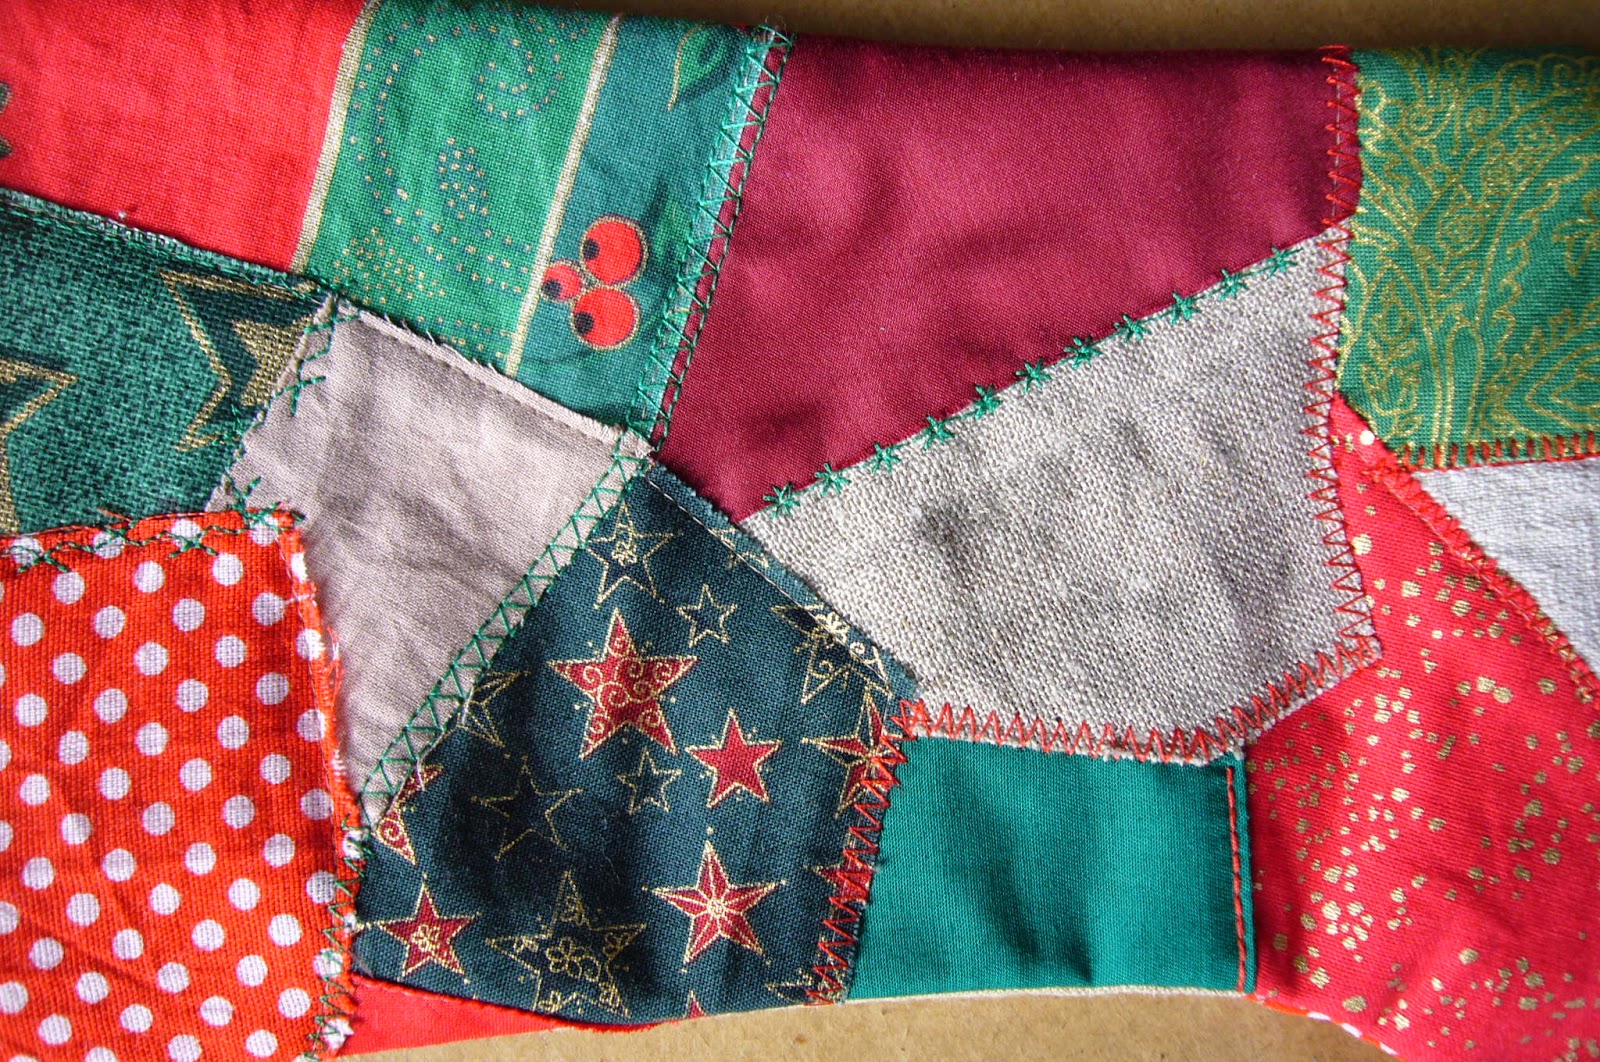
 I like too much this one with crazy patchwork so made some more stockings.


This one with back made from Christmas table topper.


The most beautiful by my opinion is this one


with back for which I used many machine stitches and a golden thread.


I had to made a stitch bible :)

Merry Christmas to all of you!

Wednesday, December 17, 2014

A Christmas swap

It is always amazing to receive  gifts.
And taking part in a swap is much more funny.
It was a challenge to be a part of Christmas swap .
I am well known with my love for making small things - mini wall hangings, mini art quilt, etc.
Now I wanted to make something more casual and I decided to sew a needlecase.
Everyday usage is a good way to remember the person who made it.


P.S. Some tips for my followers.

As you have seen the lining is made from two different colored fabrics.
If you use one fabric, get two pieces sewn together in the middle.
Note that you must have an opening in the center for turning over. (see last picture for details)


Place the prepared top right side up.
 

Place the lining right side down and stitch together round WHOLE perimeter.
This trick will guarantee you a perfect look.


Clip the edges to reduce bulk, turn right side out and iron well.
Close the opening using blind stitch.
Stitching felt in the middle will cover your possible mistakes.


Saturday, December 13, 2014

More Christmas trees

Do you remember my post from two days before? It was about a Christmas tree ornament.
Why not sewing more of them and give friends for decoration?
I decided to use small scraps from sewing stockings to make some more.
Collect different red, green, golden, printed fabrics and felt strips and cut them to triangles.
Thinking of how make my work easy I cut a rectangle of bating and placed them on.


Pin and stitch round perimeter.
Then trim leaving bating a quarter inch bigger.


Fast and easy!
Now turn back and stitch the rear triangle.
Clever, right?
Add string hangings and  count them. They were 14.
Good number for passing away 2014.


Thursday, December 11, 2014

Oh, Cristmas tree

My dear neighbours were on the way to their home in South Africa.
I wanted to make a small, but special gifts for Christmas.
They had packed their luggage so it had to be small and remarkable. From all my heart.
Paper stars for the boys and a fabric tree for the girl. All they could be hang on the Christmas tree.


Making a tree is very easy and fun.
You will need:
      some fabric scraps
      white batting
      wooden clip
      string


Cut triangles from fabrics - The outer ones have to be smallest, next ones bigger and the white one - biggest.
The size depends on the wooden clip.


Lay three of them as shown - white batting, green (right side up). red dotted (right side up).
Stitch them together round perimeter of the red one.


Then turn back and place another couple - green red triangles and stitch the same way.
Add about 10" piece of string folded in half. I have used zig-zag stitch.


Add embellishment as beads, golden thread, embroidery if like.
And clip the wooden clip!


Monday, December 1, 2014

Give a towel charm look

It was plain white kitchen towel. Organic cotton waffle wave towel.
A little bit boring with its simplicity.
I needed to put a small accent with thread or piece of fabric.


It was a fast and funny project so I want to share some details.

You will need two strips 2 inch width different printed fabrics and two suitable colors pearl cotton.

Sew the strips right sides together and press seam allowances open.
Then rotary cut at every 1 1/2 inch beginning from one end. See the picture.


Stitch together every two pieces until having a long strip consisting of alternate pieces.

I have cut strips 2 inch width, but you could use other width.
If you want that finished pieces are squares shape keep in mind to rotary cut half inch shorter than the width of the strip (for the two seam allowances  each measuring a quarter inch).

Stitch on the towel row edges applique.
Add running stitch along the strips.


Tuesday, November 18, 2014

Thanksgiving giveaway

On the eve of Thanksgiving day and looking forward quiet Christmas days

Attention, please!
to ALL quilters
I wart to say you THANKS! 
For supporting me as an indie designer. 
For inspiration you are giving to me every day with your projects made by my patterns.

Today is the start of the RightPatterns' Give-away to celebrate the holidays.
It is running from 18th November to 5 th December 2014 .
The winner will receive my newest pattern Merry Moustache Mug Rug.


To enter this giveaway, leave a comment telling me
What colors is your Christmas?
Bonus entry:  followers , new and old, please leave a second comment.
I will close Giveaway on 5 th December 2014 and will announce the winner (chosen by Random generator) here on my blog and by e-mail no later than 8 th of December.

Good luck!
P.S. 
If you are interested in the pattern, but are not the lucky winner download the pattern from HERE.

Love apple mug rug

I love apple!
The apple as a fruit of the love!
This mug rug is inspired by apple itself.


Some suitable printed fabrics with hearts and flowers were cut and added to a dotted piece.
After some wandering and three hours later the result is here.
The pattern is available on ETSY and CRAFTSY.

Saturday, November 8, 2014

Polka dots - new baby quilt

The story began with a kid duvets and set of sheets for a baby. They are so sweet and grandmother-to-be want to have a baby quilt and sleeping bag for her first grandson.
The room is decorated vintage style and she want to surprise her daughter (future mom) with this present.
Here are the sheets.


And the pillow cases.


The quilt has to be the same style and colors.
I decided Polka dots similar colors will be perfect addition to the set.
The cubes I have designed earlier will fit in the center of the quilt.
New version of the cubes is available here.
Immediately began drawing and calculated the fabrics.

First I have paper pieced the cubes and gathered them.
I decided applique on a rectangle and make a frame with squares.
Folded the cube's edges by iron without removing paper, then torn off and appliqued.


Next step was to cut squares. If you have jelly rolls by hand they are perfect stash for this quilt.
The small squares are 2.5". The stripes are 2.5", too.
The big squares are 4.5".


I have ordered 4 of the squares on the table and have sewn them together.


I have gather squares randomly keep in mind to put "the warm" colors next to "the cold" ones.

Order all the finished 4.5" squares in 2 rows to create frame.


 Then stitched to the center rectangle with appliqued cubes, quilted by hand and bound.
Here is the finished quilt.


I have made a sleeping bag in addition.


And small pieces which has left place on a cardboard to make a card.


Dear Victor, welcome to this world!
Wish you the most beautiful life full with surprises and miracles!.


Thursday, October 30, 2014

A Bavarian style cushion - made by order

So what should you make if you have such complicated order.
I was asked to sew a cushion cover Bavarian style, traditional German look for a 60 years jubilee.
I had idea to make something like houses with beams. Do you remember the houses in Germany?


Then wanted to make a cushion like a house,...
Then have seen a linen shirt with embroidery and gorgeous buttons on the front.
A brilliant idea crossed my mind.
Cut rectangle, different strips, attached on a piece of batting. Voila...


 What about the back? Do you wander how I have used the buttons?


So did I the cushion.

Tuesday, October 21, 2014

Memory quilt warms the heart

What days were passed away!

I have finished the memory quilt for my Mum jubilee.
Last two weeks my thoughts and actions from morning till evening were dedicated to making a present.
I decided making such quilt in July when cleaned a wardrobe full of old clothes - a skirts given her as a wedding gift , some blouses and jackets, a dress, a costume I have sewn for her for my brothers' wedding.

I have seen many memory quilts and waiting for an ocassion to make one.
Especially like Sherri Lynn Wood from Daintytime.
It is great pleasure to do improvisational quilts so the fun began.
I put my mum's favorite music in the player and keeping her in mind began cutting and sewing.
I remember many days spent together, lessons I have learned, my childhood.
Here is what has happened.


The very first block was made from her favorite blouse.
Embroidered flowers surrounded by tiny pieces from other blouses.


Next one was first my patchwork block I have ever made - Marple leaf.
This time made using rotary cutter, ruller and mat. How easy is to make it now instead of using scissors.


And cute accent with buttons and yo-yo. One of the button is from my fathers jacket :)


Mum like yo-yo so much a year ago and I taught her to make them.  She decorated some cushion covers.


Mum loves gardening. She adores flowers and trees so many blocks were quilted such FMQ.


For the back I collected a wedding gift dated more then 50 years ago.
The time left only 3 small holes so I repaired them quick by small applications.


And of course added a pieced heart with embroidered date of the birthday.


Sweet dreams under this quilt dear Mum.
I am sure the memories and our love will warm you.